2.2.2 Example
Regardless of whether you are a private, hybrid or public vCloud provider, securing communication between end tenants of the vCloud portal and the vCloud Director infrastructure usually requires implementing SSL Certificates from a trusted Certificate Authority (CA). The following example uses the QuoVadis CA to issue SSL certificates for vCloud Director.
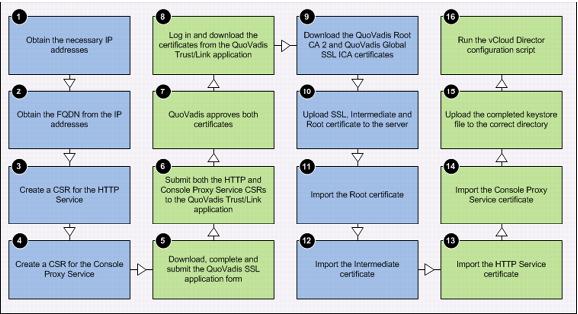
This process flow shown in the following figure includes procedures for requesting, configuring, obtaining, and installing an SSL certificate from QuoVadis.
NoteQuoVadis is used for this example, but any trusted CA can be used.
Figure 3. Requesting, Configuring, Obtaining and Installing an SSL Certificate
2.2.2.1. Prerequisites for Creating the Required Certificate Signing Requests
Before creating a Certificate Signing Request (CSR), you must know the IP address and FQDN (fully qualified domain name) of your servers.
To list server information and change to the keytool directory
1. From the vCloud Director cell, run ifconfig (8) to list the IP addresses for this server. Record the two IP addresses that correspond to the vCloud Director HTTP service interface and the Console Proxy Service interface.
2. To obtain the FQDNs, use the command nslookup ipaddress. Record these FQDNs, which are needed for the HTTP server and Console Proxy service SSL certificates.
3. Change your directory to /opt/vmware/vcloud-director/jre/bin/keytool.
keytool is installed along with vCloud Director by default. Alternatively, you can use keytool on another computer that has a Java version 6 runtime environment installed, and then import the created Java Keystore file onto your vCloud Director server. This example assumes that you are using the keytool installed on the vCloud Director server.
2.2.2.2. Part I – Creating the CSR for the HTTP Service
To create the CSR for the HTTP service
1. After you have navigated to the keytool directory, run the command shown in the following screenshot.
keytool –keystore certificates.ks –storetype JCEKS –storepass password –genkey –keyalg RSA –alias http
NoteYou can change the values for variables, but any changes that you make must be used throughout the entire process. For example, if the keystore name is changed from certificates.ks to mysslcertificate.ks, then you must continue to use mysslcertificate.ks in place of certificates.ks.
2. When prompted, type your first and last name.
3. When prompted, type the FQDN (fully qualified domain name) to use for the HTTP service certificate.
4. Type the following answers when prompted:
What is your first and last name? [Unknown]: mycloud.mydomain.com
What is the name of your organizational unit? [Unknown]: MyCompanyDivision
What is the name of your organization? [Unknown]: MyCompanyLegalName
What is the name of your City or Locality? [Unknown]: CityOfMyCompany
What is the name of your State or Province? [Unknown]: StateOfMyCompany
5. Type yes to continue when keytool summarizes your entries.
Is CN=mycloud.quovadisglobal.com, OU=Cloud Services, O=QuoVadis Limited, L=Hamilton, ST=Pembroke, C=BM correct? [no]:yes
NoteQuoVadis is used for this example, The information that this summary displays should use your company’s information.
6. Confirm that you have access to this keystore file by entering a password. This uses “psswrd” as an example.
7. Type the key password for <http> psswrd (press Enter if it is the same as the keystore password).
8. Run the following command to obtain your CSR This creates the http.csr file.
Keytool –keystore certificates.ks –storetype JCEKS –storepass password –certreq –alias –http –file http.csr
2.2.2.3. Part II – Creating the CSR for the Proxy Service
To create the CSR for the proxy service
1. In the keytool directory, run the following command:
keytool –keystore certificates.ks –storetype JCEKS –storepass password –genkey –keyalg RSA –alias consoleproxy
2. When prompted, type the FQDN (fully qualified domain name) to use for the Console Proxy Service certificate. Use the same FQDN as for the HTTP service certificate.
3. Type the following answers when prompted:
What is your first and last name? [Unknown]: mycloud.mydomain.com
What is the name of your organizational unit? [Unknown]: MyCompanyDivision
What is the name of your organization? [Unknown]: MyCompanyLegalName
What is the name of your City or Locality? [Unknown]: CityOfMyCompany
What is the name of your State or Province? [Unknown]: StateOfMyCompany
4. Type yes to continue when keytool summarizes your entries.
Is CN=mycloud.quovadisglobal.com, OU=Cloud Services, O=QuoVadis Limited, L=Hamilton, ST=Pembroke, C=BM correct? [no]:yes
NoteQuoVadis, an international Certification Service Provider (CSP), has been used in the summary to provide a clear example. The information that this summary displays should use your company’s information.
5. Confirm that you have access to this keystore file by entering a password. This uses “psswrd” as an example.
6. Type the key password for <http> psswrd (press Enter if it is the same as keystore password).
7. Next, run the following command to obtain your CSR (Certificate Signing Request). This creates the consoleproxy.csr file.
Keytool –keystore certificates.ks –storetype JCEKS password –certreq –alias consoleproxy –file consoleproxy.csr
2.2.2.4. CSR Submission and Certificate Collection from QuoVadis
At this point you should have two separate CSRs, one for the HTTP service and one for the Console Proxy service (named http.csr and consoleproxy.csr in this example).
To complete the SSL Certificate Request forms and get access to the QuoVadis Trust/Link system
1. Copy both of these files to a computer that has Internet access.
3. Submit the form to QuoVadis.
QuoVadis then validates your organization. After successful completion, you receive a login to the QuoVadis Trust/Link system.
2.2.2.5. Part I – Submitting your CSRs
To submit your CSRs
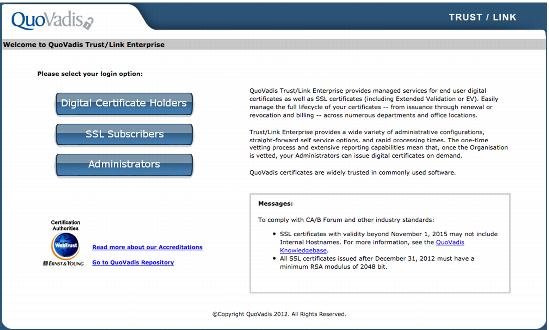
2. Click SSL Subscribers.
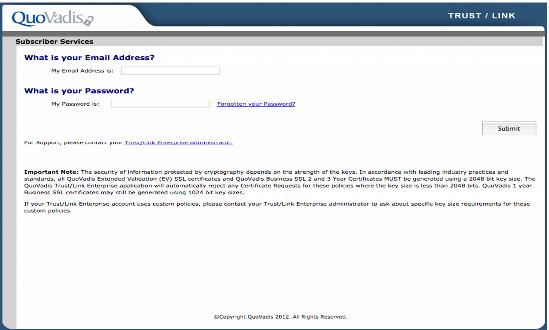
3. Log in with your email address and password.
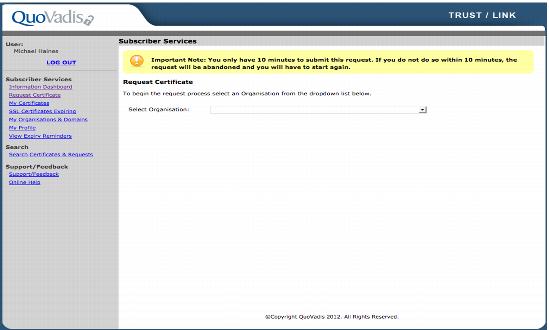
4. Click the Request Certificate link under the Subscriber Services heading in the left pane. You have only 10 minutes to complete each request.
5. Select from the drop-down menu the approved organization to which you want to submit an SSL certificate.
6. Select the Policy Template that you want to use from the drop-down menu.
NoteIf you do not have any policy templates to choose from, contact QuoVadis Support.
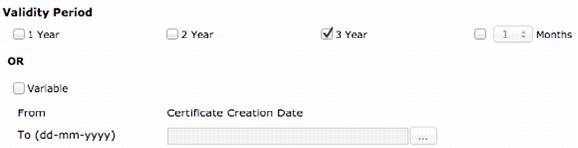
7. Select the Validity Period of the certificate.
8. Optionally, select the Server Platform from the drop-down menu.
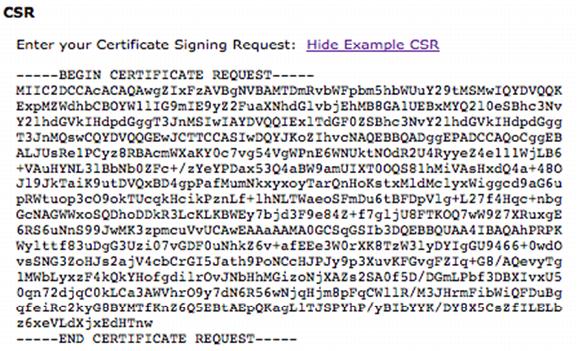
9. Open the HTTP CSR (or the Console Proxy CSR if this is your second run through) using a text editor such as VI on Linux or Notepad on Windows. Copy the contents from the text editor into your clipboard).
10. In Trust/Link, paste the contents of your CSR in the Enter your Certificate Signing Request field, and enter in all of the contents of your CSR, including the BEGIN and END lines.
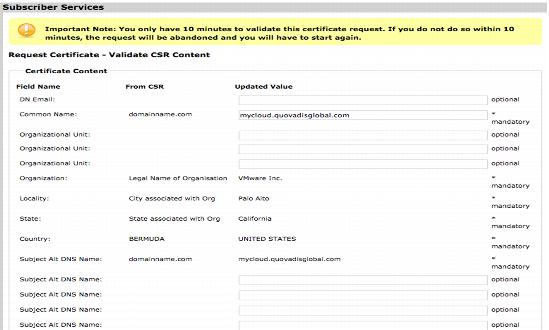
11. Click Submit. The CSR that you submit is decoded and displayed in the Validate CSR Content screen.
12. Verify the content of the CSR and make changes, if necessary.
13. If the certificate requires any SAN fields, enter them into the Subject Alt DNS Name fields in the Certificate Content section. If any SAN fields are added, verify that the Common Name is included as the first SAN field.
14. When you are finished, click Submit. QuoVadis reviews the details of your certificate and contacts you if anything is incorrect. Your certificate is then approved.
15. Repeat this procedure for consoleproxy.csr
2.2.2.6. Part II – Obtaining your SSL Certificates
After the request has been approved, you receive an email informing you that your certificate is ready to download.
To obtain your SSL certificates
2. Click SSL Subscribers.
3. Login with your email and password.
4. Click the My Certificates link under Subscriber Services in the left pane.
5. Click the Common Name of the certificate that you applied for. The status of the certificate should be Valid Certificate.
6. A summary of the certificate details is displayed. Click Download.
7. On the Download your SSL Certificate page, click the Download your SSL Certificate in PEM (Base 64) format icon. Rename this file to http.crt (assuming that you are downloading the certificate for the HTTP service).
8. Repeat this procedure for the Console Proxy Service SSL certificate. When you obtain this file, rename this file as consoleproxy.crt.
2.2.2.7. Installing your SSL Certificates
At this point you should have both SSL certificates for mycloud.mycompany.com, one for the HTTP Service (http.crt) and one for the Console Proxy Service (consoleproxy.crt).
To install your SSL certificates
1. Transfer the http.crt and consoleproxy.crt files to the keytool folder.
4. Transfer both of these files to the keytool folder on the vCloud Director cell.
The following files should be in the keytool folder:
 certificates.ks
http.crt consoleproxy.crt quovadis_rca2_der.crt quovadis_globalssl_der.crt 5. Run the following command to install the QuoVadis Root CA 2 certificate into the keystore file.
keytool –storetype JCEKS –storepass psswrd –keystore certificates.ks –import –alias Root –trustcerts –file quovadis_rca2_der.crt
6. Run the following command to install the QuoVadis Global SSL ICA certificate into the keystore file:
1. keytool –storetype JCEKS –storepass psswrd –keystore certificates.ks –import –alias intermediate –trustcacerts –file quovadis_globalssl_der_crt
7. Run the next two commands to install both the HTTP Services and Console Proxy Service certificates into the keystore file:
keytool –storetype JCEKS –storepass psswrd –keystore certificates.ks –import –alias http –file http.crt
keytool –storetype JCEKS –storepass psswrd –keystore certificates.ks –import –alias consoleproxy –file consoleproxy.crt
8. Run the following command to verify that all the certificates are imported correctly:
keytool –storetype JCEKS –storepass psswrd –keystore certificates.ks –list
9. Move the certificates.ks file to a directory of your choosing. The directory used in this example is /opt/keystore/.
10. Remove or delete the .crt files from the vCloud Director cell after you have imported the certificates into the keystore.
http.crt consoleproxy.crt quovadis_rca2_der.crt quovadis_globalssl_der.crt 11. Run the configuration script to configure vCloud Director. This script is located in the /opt/vmware/vcloud-director/bin/configure directory.
12. Specify the IP addresses for both the HTTP and Console Proxy Service.
13. When requested, enter the path to the keystore file. This is the folder where you uploaded your certificates.ks file.
14. Enter the path to the Java keystore that contains your SSL certificates and private keys:/opt/keystore/certificate.ks.
15. Type the password to access the keystore file. Also type private key passwords for the certificates.
Please enter the password for the keystore: psswrd
Please enter the private key password for the ‘http’ SSL certificate:
Please enter the private key password for the consoleproxy SSL certificate:
16. Finish the configuration according to your setup. When the process is complete, your SSL certificate should work with vCloud Director.